There are now two Autonomy Bags constructed and available for your own self-containment use. If you are interested in using an Autonomy Bag please contact autonomybag(at)gmail(dot)com. (Bag transfer is currently only available in the Chicago area.)
If you are so inclined you can also construct your own Autonomy Bag. Instructions for how to do so are available here.
If you are in need of ideas for what to do once you have obtained an Autonomy Bag, refer to these records of recent deployments. But, please do not view these as exhaustive of bag implementation strategies. Application of the bag can be highly variable.
Thursday, December 1, 2011
Autonomy Bag - Construction Method
Materials:
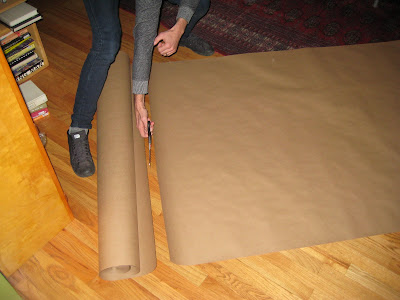
- 48 inch roll of brown craft paper.
- Tape measure
- Scissors
- Clear tape
- Rubber cement
- Stencil set
- Black spraypaint
Steps toward assembly:
- Roll out brown paper and measure off 138 inches in length. Cut that piece off at a nice perpendicular.
- Using your friendship with gravity, fold the length of that piece into even thirds. Make both of the creases fold in the same direction.
- Fold each outer third into halves. Once again, make sure the crease direction is following the same direction as the earlier folds.
- Make a perpendicular fold at 14 inches off one of the short sides. Fold in the same direction as the other folds.
- Turn your focus on the second and fifth sections of sixths, counting from the length-wise side. Let say you are standing at the long edge, and the other long side with the perpendicular fold is opposite you. For each, you want to mark a point which is at the center of both columns, and one half the column's width below the perpendicular fold.
- Draw lines from those spots, which intersect with the corners of the perpendicular folds and run all the way to the edge of the paper.
- Fold these lines in the direction opposite to all the folds.
- Now we can begin using these creases to form the paper into a bag-like cube. It is helpful to do this with the short perpedicular fold flush against the floor and with the long edge sides standing up. It is most helpful to have a trusted bag-folding companion hold these sides up for you while you fold.
Check point!
At this point you should have a pre-folded rectangle of brown paper that resembles this reference sheet. The next step is folding which is a little tricker to conceptualize so in this reference images key folding lines are highlighted. Red lines fold toward the interior of the cube and blue lines fold toward the exterior.
- Now turn the first side of the bag into a right angle. The diagonal fold (or blue line) will fold under the large flap of leftover length from the perpendicular fold. Fold it down nice. The fold creates a diagonal from the corner you just created. Tape this corner in place wherever seems most helpful.
- Continue to fold the bag sides at right angles. Allow the diagonal folds (again, represented by the blue lines in the reference image) to slip under the bag and keep taping to keep your form.
- Once you have folded all four corners, bring the two seams together and tape them in place. During this whold holding and taping process you'll probably want someone holding the edges up for you.
- Carefully hop in the bag with the rubber cement. Begin cementing all of the creases on the interior. Hold it there for a bit to let it dry.
- Now we have the form. Flip it upside-down and prop it up on some high standing object that fits in it. I used two bar-stools.
- Spread rubber cement on any exterior creases necessary to add extra strength. Allow the cement to dry.
- Fold top of the bag down to one side. This naturally collapses the bag and creates creases on the short ends.
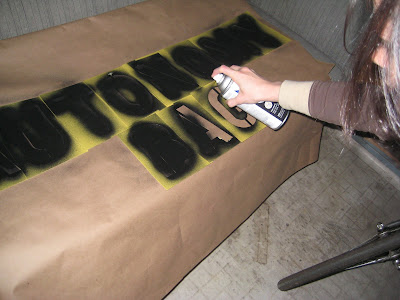
- Now bring the flattened bag to a well ventilated area. Lay it flat on a surface and arrange the stencils on the front of the bag to say "autonomy bag."
- Lightly spraypaint the letter forms in the stencils and let dry.
- There you have it. You and possibly a partner may now experience a makeshift and momentary structure of autonomy in otherwise interpellated constructions of social space.
- If you like you may fold the flattened bag into thirds and easily stash and port the bag inside a standard CVS trash bag.
Autonomy Bag Deployed
Here are records of recent Autonomy Bag deployments.
Second deployment: Kohl's and Best Buy, Elston Ave, Black Friday
Third deployment: Smith Park
Fourth deployment: Chicago Loop
Second deployment: Kohl's and Best Buy, Elston Ave, Black Friday
Third deployment: Smith Park
Fourth deployment: Chicago Loop
Subscribe to:
Posts (Atom)


